Last Updated on March 25, 2021 by Ariana
There are many reasons why PC gamers won’t exchange their trusty laptop or desktop for a console. Quite simply, PC gamers have more choice when it comes to the number of games available to them, and those games are far cheaper than you need to pay for console games.
A computer is easier to immerse yourself into, partly because of how close you sit to the screen, and the quality of graphics is better than a console, too.
The only thing that can sometimes hold PC gamers back is their operating software. While Windows 10 is an excellent piece of software, it can slow down gaming if you don’t make a few tweaks. We’re now going to look at how to optimize Windows 10 for gaming so that you can have the most immersive gaming experience.
Top Tips For How to Optimize Windows 10 For Gaming
Tip #1 – Change Windows 10 Automatic Updates
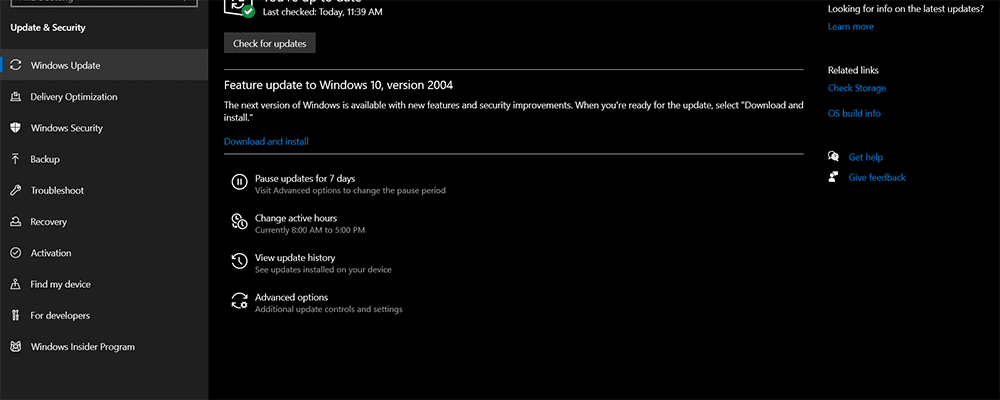
The easiest and simplest way to optimize Windows 10 is by altering how Windows searches for updates and downloads them. This is useful for several reasons. Firstly, you’ll find that your gaming performance won’t be interrupted by lagging because your internet’s bandwidth will be used up by the download of Windows updates.
They can be large files. You don’t want them taking up bandwidth. You also don’t want to ruin your gaming experience if your computer decides to restart so it can finish the Windows update.
To do this, you just need to press the Windows key, then select Settings from the list of programs. Once Settings has opened, you should see a choice for Windows Update on the list. Simply click on Windows Update, then scroll down to Advanced Options. Click on it.
Then turn off the automatic restart setting. You also can pause Windows Update for up to 35 days, so you won’t have any issues for a while, and can play game after game without ever having your bandwidth strained by a Windows 10 update.
Tip #2 – Change Your DNS Settings
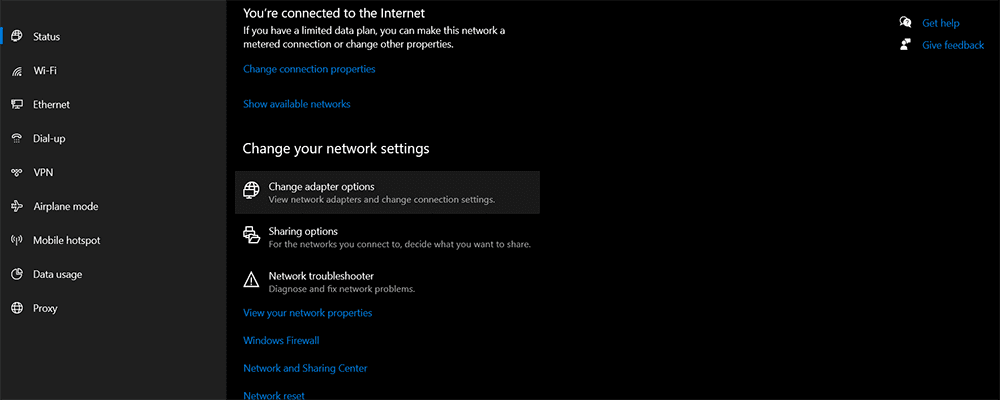
The second way you can optimize Windows 10 for gaming is by altering your DNS settings. This is ideal for any online gamer, as it will reduce issues related to network traffic.
You’ll want to press the Windows key, then select Settings from the list of programs.
Then, you need to look through the list on Settings and click on Network & Internet. This will open up a new page, and you want to select Change Adapter Settings from the list.
You should see your WiFi network’s name on the new list. Right-click on it. And then you want to click on Properties.
You’ll see a box with a list that has Client for Microsoft Networks at the top. Click on Internet Protocol Version 4, which is fourth on the list. You should now be able to see what the DNS numbers are for your WiFi network. It’s best to write down these numbers, as you may want to change the settings back in the future. Once you’ve done this, then you’ll want to change the numbers to 1.1.1.1 and 1.0.0.1. After that, it’s best to restart your computer.
Tip #3 – Use Windows 10 Game Mode
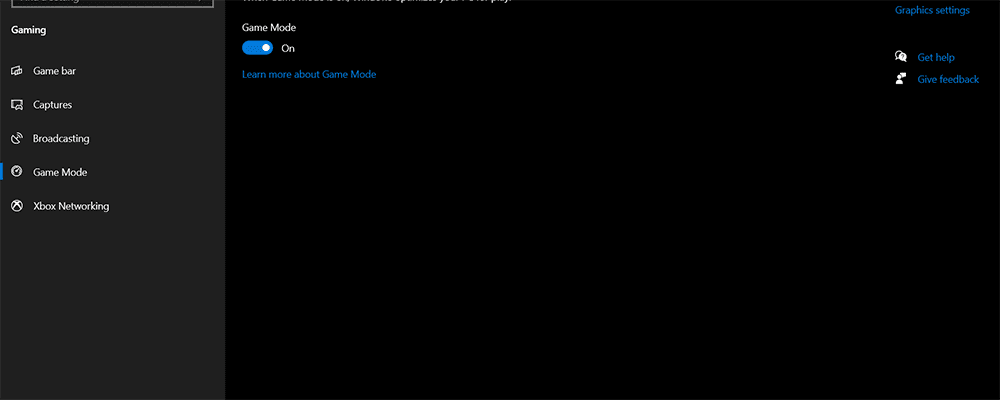
Game Mode is built into Windows 10 for gaming enthusiasts, so if you use Windows for games, then you want to use Game Mode too. It’s simple to switch on Game Mode. Once again, you want to tap the Windows key, then select Settings from the list.
You’ll now see that one of the options is entitled Gaming. Click on it. Then look on the list on the left for Game Mode. Click on Game Mode. And then you should see a toggle for Game Mode. If it’s toggled off, then turn it on, and if Game Mode is already on, then you don’t need to do anything.
Tip #4 – Turn Off Windows 10 Notifications
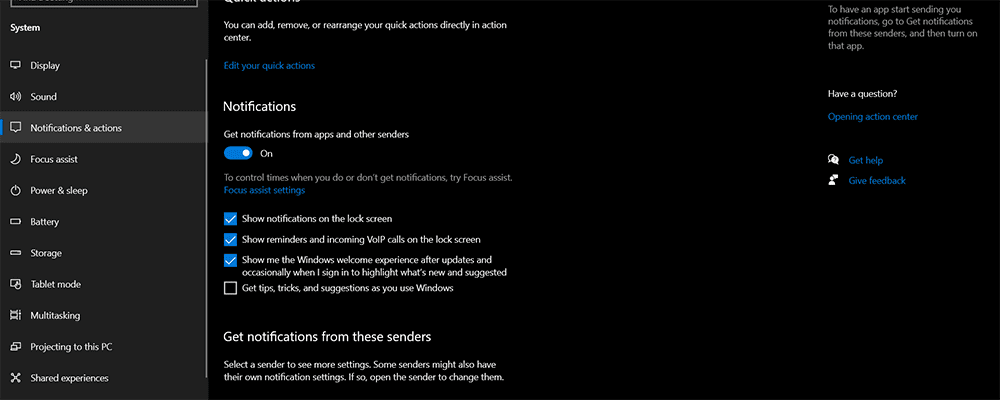
The notifications that Windows 10 give you are very important, as they tell you exactly what’s going on with your computer. But if you want to optimize Windows 10 for gaming performance, then it’s best to alter the settings for these notifications, as you could find your gaming performance ruined by an unwelcome notification.
To alter Windows 10 notifications settings, you need to tap on the Windows key, and then go to Settings. In the top left, you’ll see System, and this is what you want to click on. You now have two options. You can click on Notifications and then select what Windows 10 notifications you want to receive and when. You can also click on Focus Assist. There’s an option on this page to turn off all Windows 10 notifications while you’re playing a game.
Tip #5 – Change Mouse Acceleration Settings
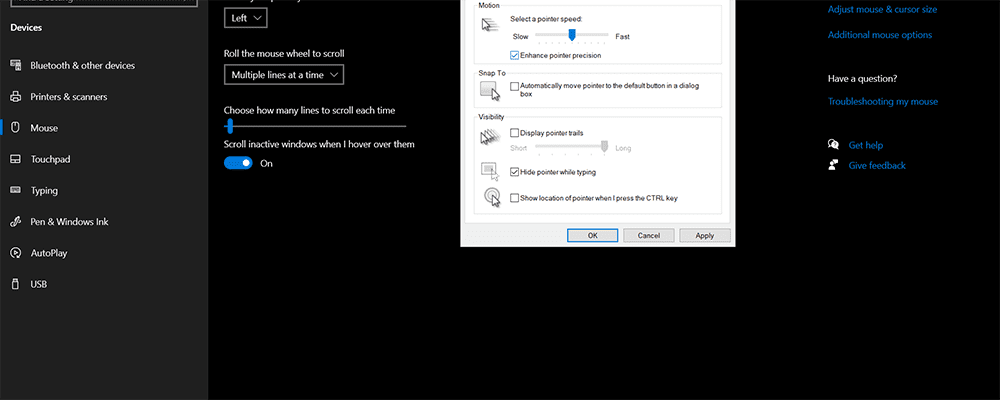
Another way to optimize Windows 10 for gaming is to disable mouse acceleration settings. To do this, you’ll want to go to Settings, then click on Devices, and then select Mouse from the list on the left-hand side. You then want to click on Additional Mouse Options.
Once you’ve done this, you should see an option for Pointer Options, which is what you want to select, and then, so that you can improve gaming performance, you want to make sure that there’s a tick in the box beside Enhance Pointer Precision. You’ll find that after you disable mouse acceleration settings, it will also give you a more intuitive cursor and mouse relationship, which can only enhance gaming performance.
Tip #6 – Update Your Drivers
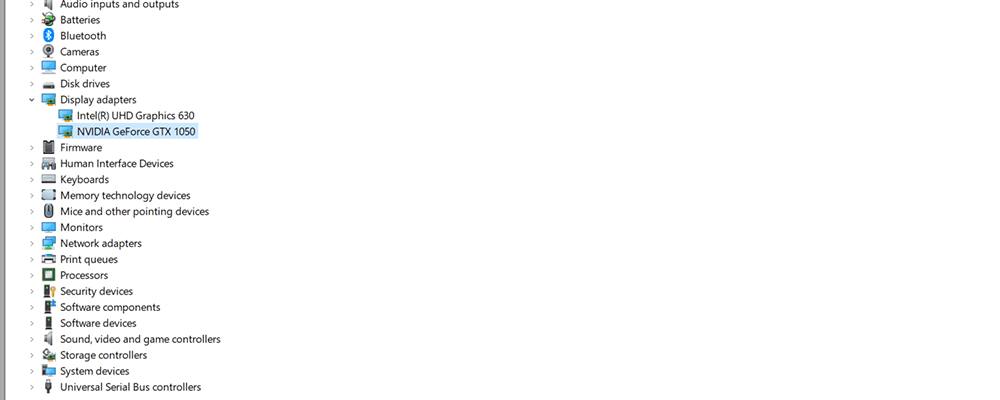
As every keen gamer knows, gaming performance is at its best when graphics run smoothly without any lag, and to adjust for best performance, you’ll want to make sure that your drivers are all up to date. This way, you can enjoy a Windows gaming experience at its best.
There are several ways that you can update your drivers on Windows 10. Perhaps the easiest way, however, is to visit your computer manufacturer’s website. To do this, you should simply type into a search engine the name of your manufacturer and the words ‘drivers update’. This will then take you directly to the right page.
Tip #7 – Improve Your Computer’s Power Performance
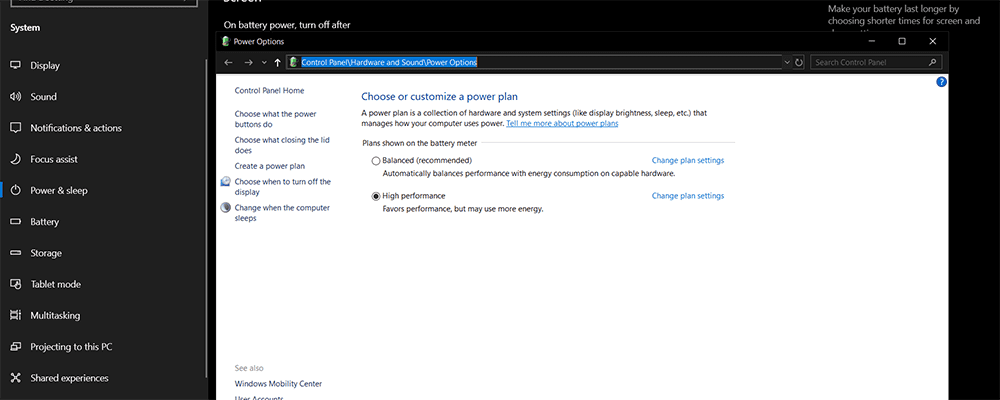
To optimize Windows 10 for gaming, you’ll want to change your power plan for high performance. At the moment, it’s likely that your current power plan won’t offer the high performance that you need for Windows 10 gaming. To adjust for the best performance, you want to follow these steps.
First, you want to tap the Windows key, and then you want to select Settings from the list of programs.
You next want to click on System, which is in the top-left corner.
On the left, you will see a list, and you want to select Power & Sleep from this list.
You then want to click on Additional Power Settings.
This will open up a new box for Power Options.
You will see your current power plan, and it will have a description beside it, such as Balanced.
You want to click on Change Plan Settings.
Now you’ll be able to change your power plan, so it offers high performance for Windows 10 gaming.
Tip #8 – Change Your Gaming Client’s Auto-Update Settings
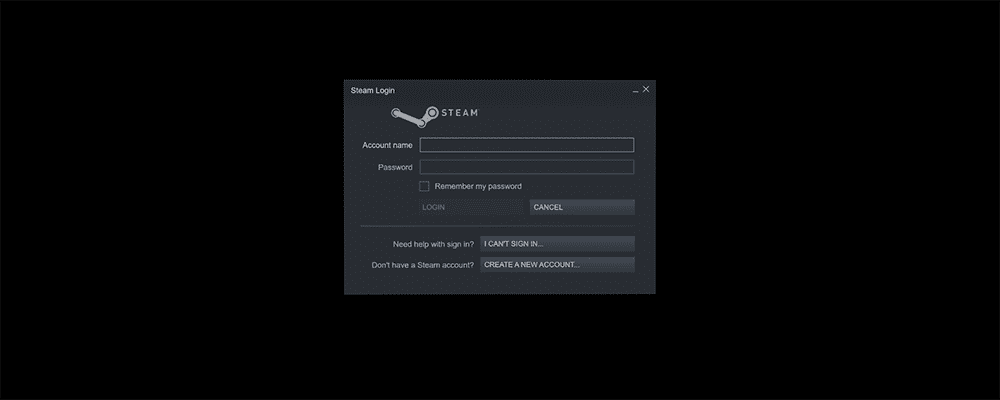
As we’ve already discovered with Windows 10 Update, if you have automatic updates running in the background while you’re gaming, then it will hamper the performance of your computer and your internet.
If you use Steam or Blizzard or another gaming client, then you may have it set up so that you automatically download updates to your games when they’re ready, but you don’t want this to happen when gaming. Windows 10 has to be optimized for better performance, but it can only do so much. You also need to change the settings on other software if you want a better Windows 10 gaming performance.
The process you need to go through to turn off automatic updates so that you can optimize Windows 10 for gaming will depend on your gaming client.
With Steam, you just need to open the app, go to the settings area, and then to downloads, and you then want to make sure that Allow Downloads During Gameplay isn’t selected.
You may also want to turn off updates for the odd game or two that you don’t tend to play anymore. To do this, you just need to visit the Steam library, locate the game you’re not playing much anymore, and then alter the update settings by right-clicking on the name of the game, and then opening Properties. You’ll see an area here that’s focused on Automatic Updates. You want to turn them off for this game and for any game in your library that you don’t use anymore.
Tip #9 – Download the Latest Version of DirectX

As every Windows gamer will tell you, DirectX is an essential component of Windows 10 for making the performance of a game run smoothly. That’s the reason why you need to make sure that the latest version of DirectX is installed, as it’s necessary if you truly want to optimize Windows 10 for high-level game performance.
The most recent DirectX version is called DirectX 12, although Microsoft has announced that the next version DirectX 12 Ultimate will be available for Windows 10 users soon. To find out what version you have so that you can ensure that you’re up to date, then you need to open Windows Power Shell.
Once you’ve done this, you want to type dxdiag into the Windows Poer Shell, and then press Enter. This will load up a box with all the information about DirectX. You’ll then be able to see what version of it is currently installed on your Windows 10 computer.
Tip #10 – Change Visual Effects Settings
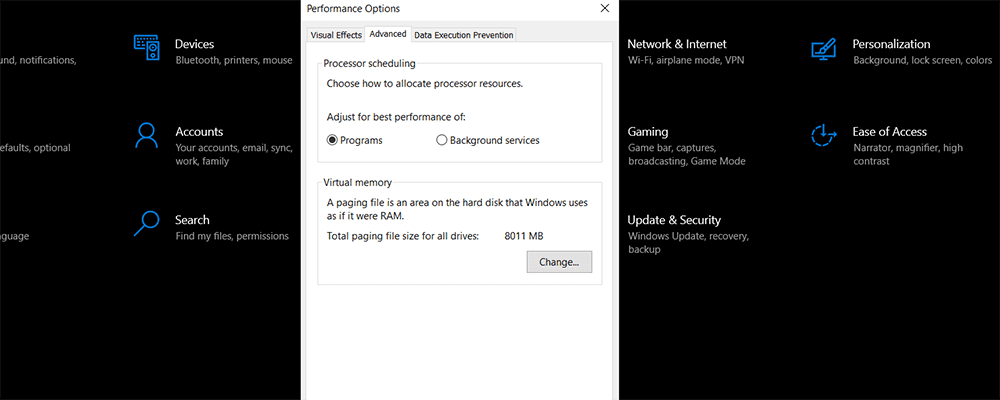
The final way that you can optimize Windows 10 for gaming performance is by altering your current Visual Effects settings. It’s very easy to change your Visual Effects settings on Windows 10, and it can have a big impact on performance too.
The reason why you should do this is that your computer will be doing too much at one time. You want your computer to be dedicated to the game you’re playing. Windows 10, however, will be focused on what’s running in the background while you’re playing the game.
To get to the right area of Windows 10, you should press the Windows key and the letter I at the same time. You will now see a list of options, as well as a search box – you’ll want to type ‘Performance’ into this box. This will bring up another four or five options. The one that you want to click on is ‘Adjust the appearance and performance of Windows.’
This will open up a new box. You’ll see that Visual Effects are listed here. You’ll also see that there are four options for changing them. The first in the list is ‘Let Windows choose what’s best for my computer.’ To optimize Windows for gaming, you want to choose ‘Adjust for best performance’ instead.
Next to the Visual Effects tab at the top, you’ll see another one for Advanced. You want to click on that. Again there will be two options. These two options are related to how you want Windows 10 to adjust for performance. You want to select ‘Programs,’ not ‘Background Services.’
Summary
There are many small tweaks and fixes that a gaming enthusiast can do to optimize Windows 10 for better gaming performance.
For the most part, the things that get in the way of gaming are easily fixed, and to complete all the tips on this list, you’ll barely need fifteen minutes. Spending this short amount of time on turning off automatic updates for Windows 10 and your gaming client or altering the mouse, driver, and power settings can have a huge impact on the speed and fluidity with which you can play a Windows 10 game.
It’s always important for your computer performance that all your hardware, software, and drivers be up to date, and this’s especially true for game performance too.
Some things that can optimize Windows 10 for gaming are quite simple, such as turning off your notifications. How many times have you found a game interrupted because Windows wants to notify you of something that could certainly wait until a later time? Turn them off, and you’ll no longer be interrupted. And while you’re at it, make sure that Game Mode is switched on too.
And follow all the tips on this page, and you’ll have a quality experience gaming with Windows 10 in the future.



No comment yet, add your voice below!