How to Check The Age of your Laptop

Laptop on a table

Many reasons can make us ask ourselves, ‘How old is my computer?’ And if you’re asking yourself this question right now, then you’ve come to the right place because you’ll learn exactly how to answer that question.

You won’t ever need to ask, ‘How old is my Computer?’ ever again. We’re going to find out how you can date your laptop or Mac. We’ll also have a look at the reasons why you might want to know how old your laptop is. Let’s get going.

How to Check the Age of a Windows Laptop

Person using laptop closeup

If you want to find out the age of your laptop, then you have two methods available to you with a Windows laptop. Each method will tell you a different age, though. You can either find out when it was that you bought your computer or you can find out your computer manufacture date, which are two different things. Let’s begin with how you can find out your laptop’s manufacturing date.

Checking a Laptop’s Manufacture Date

The first piece of information you need is your laptop’s serial number. On most laptops, you’ll find this number on the bottom of your computer. A good tip is to close your laptop, then lift the laptop, turn it, and find the number. Once you’ve got the number, then you should write it down on a piece of paper, so that you don’t need to keep checking it when we move onto the next step.

Now that you’ve got your laptop’s serial number, you can move onto the next step. You will now need to visit your manufacturer’s website. The process for checking the age of your laptop is will differ from manufacturer to manufacturer. And, in some cases, you may need another number, such as a service code. Dell is one manufacturer that requires a service code, but this can usually be found next to the serial number.

If you’re struggling to find the right area of your manufacturer’s website to enter your serial number, then you could simply search for the manufacturer’s name and ‘serial number check’ on a popular search engine. This will take you to the correct page.

Another option is to call up the customer service number for your manufacturer. You can tell that you’re having trouble finding out the age of your computer. Then you have the right information to help them date your computer, and then ask them for help. They’ll likely be able to access the information on their system so that you can then find out just how old your laptop is.

Checking How Long You Have Owned Your Laptop

Laptop with blank screen

Perhaps the information you’re seeking isn’t the exact date that the computer was purchased but how long it’s been since you purchased the computer. This requires a slightly different process.

Firstly, it’s important to note that the age you get when you follow this process will not be exact in all cases, but it will be a similar date to when you bought the information. We’re going to discover the original install date of Windows 10 or the operating system that you use.

If you don’t have a different operating system to Windows, then you may want to visit the website of the developer of the operating system. We’re going to focus on Windows now, as it’s the most common operating system currently used by owners of laptops that aren’t made by Apple.

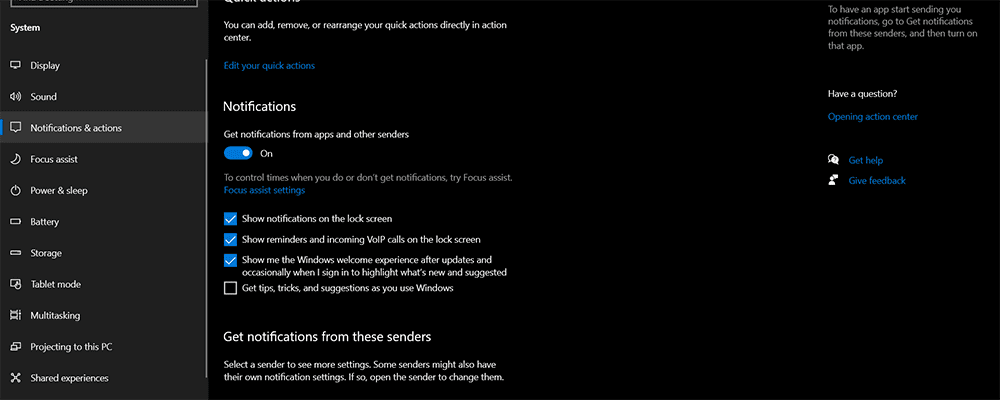
To estimate how old your laptop is, we’re going to check what date it was that your BIOS was installed. BIOS does many different jobs for your computer, but the biggest job that it does is to load up your operating system when you turn on your computer.

There are two different ways we can now check when the latest BIOS version was installed on your laptop.

The first way is to click on the magnifying glass in the bottom corner, then type in ‘Command Prompt.’ You will now see the ‘Command Prompt’ app as an option on the list. Click on it. Once the ‘Command Prompt’ has loaded, you want to type systeminfo.exe and press enter.

Once you’ve typed in systeminfo.exe and done this, a lot of information will come up, and you can scroll through this information looking for BIOS Version/Date. Next to this, you’ll see the date when the last BIOS version was installed.

Another way you can access this information through Windows 10 is by clicking on the magnifying glass in the bottom left corner and typing in System Information. You’ll see a choice in the list with the title System Information. Click on System Information. Then once you’re on the next page, you want to scroll down until you get to BIOS Version/Date. Then you’ll see the original install date of the latest BIOS version.

It’s up to you if you go down the systeminfo.exe route or the System Information route. They’ll both help you answer the question: ‘How old is my computer?’

Or will they? Unfortunately, this method is not as accurate as the serial number is for gauging how old your computer is.

Why?

This is simply because the BIOS on your system is updated by Windows regularly. Not so regular that it’s done every month. But each time Windows does a major system update, for example, when it releases a new version of Windows, then your computer system will need the BIOS updating too.

This also won’t tell you the manufacturing date, which may be more important to work out how old your computer is than knowing when the system first installed BIOS onto it.

How to Check the Manufacturing Date of an Apple Computer or Laptop

Woman using apple laptop

Whatever Apple computer you have, whether it’s a laptop or a desktop, you’ll know that it doesn’t have Windows installed on it, so you’re not going to follow the previous instructions to check how old your computer is.

To check how old an Apple computer is, then you just need to click on the old Apple symbol in the top right of your screen. This will bring up several options. You’ll want to click on the ‘About This Mac’ one. Once you’ve clicked on it, you will see the serial number of your Apple computer.

You then need to visit the Apple website and go to the warranty page. Enter the serial number for your Apple computer on this page, and you will be able to answer the question: ‘How old is my computer?’ because you’ll find out exactly when your computer was bought.

Why Might Someone Want to Know How Old a Computer or Laptop Is?

Man working on his laptop

There are countless reasons why someone would want to know how old their computer is. Mainly, it might be because they want to know if their computer is still under warranty. Otherwise, they might have bought a second-hand laptop from someone, and they want to check if it’s the age that was advertised.

Or they might be selling their computer, and they want to know the exact age so that they can advertise it properly. Others might have inherited a laptop from someone or been given it as a gift, and they’re curious to know exactly how old it is.

Summary

Now, if someone asks you the question, ‘Your computer is how old?’ then you can answer, ‘My computer is this old.’

The easiest way to find out this information is to check the serial number that’s on your laptop. You can then visit your manufacturer’s website and check the manufacture of laptop date. This is the same for all computers, whether they are manufactured by Apple, Dell, HP, or one of the other top brands.

If this all-important number is not visible to you, perhaps because of damage to the underside of your laptop, then you’re not completely unable to find out how old your laptop is. If you’re a Windows user, then you’ve simply got to find out when your system first installed BIOS.

We’ve outlined the two different ways you can find out this info. While it won’t tell you the date your laptop was manufactured, it will tell you when your system was first used. It’s likey that the date the system was first used was when you first installed Windows onto it.

That’s it. Now you’re in the best position to know how old your computer is.

How to Accurately Measure Laptop Size

Woman holding laptop

Have you ever wondered, “What is my screen size?” or “Which bag is going to work well for my laptop?” You may have also thought to yourself, “Screen size, laptop size, what’s the difference?” If so, there are simple answers to your questions. You simply need to learn how to measure the size of your laptop and the size of the laptop screen.

Many people will need to measure their laptop size, so they can find the perfect fit when it comes to a bag or a sleeve. Measuring your laptop is not as difficult as you may expect. You need to understand the jargon that goes with it to ensure that you buy a bag or a case that will fit your laptop and be comfortable to carry.

When you tote your laptop around with you daily, having the right bag for the job is critical. The best bags are designed to keep your laptop safe. Many of them offer a variety of different features that will make organization convenient. The first step in finding the best option is to measure your laptop size.

How to Measure Your Laptop Size

Top view of apple laptop

Several measurements will be taken to determine the size of your laptop. A laptop screen size is frequently displayed after the name of the computer, like a MacBook Pro 13.3. 13.3 is the size of a laptop screen. This measurement does not include the bezel (the casing around the screen). When measuring laptop size, screen size doesn’t play a role.

If you’re buying a screen protector, you will need to measure the laptop screen size with a cloth measuring tape. You should not include the bezel when taking a measurement of the laptop screen. The screen should be measured in inches, and you should go from the bottom left of the screen to the top right, diagonally. Accurate measurement of your laptop screen size will save you time, money, and frustration when buying items for it.

Now that you know how to measure the screen, you will need to measure the laptop itself before choosing a bag. The dimensions of your laptop will help you figure out what bag you should buy. When you measure a computer, you will need to take several different measurements. The dimensions of laptop bag options are typically listed as width x height x length (also referred to as depth).

Pretty much all bag options will use inches as their measurement, so take that into account when you measure a laptop. Using a measuring tape that offers inches is advantageous and saves you from having to make conversions into inches.

First, you will want to measure the width of the laptop. When measuring the width of the laptop, you should close your laptop. You will measure the width of your laptop horizontally from one side to the other. When measuring, make sure the edge is lined up, and you measure the largest part of your computer. Additionally, you should make sure the measuring tape is flat for the most accurate measurement.

When you measure a laptop, you will next need to figure out the height of it. The height measurement of your laptop size will be your smallest number. Ensure that your laptop is fully closed and then use the measuring tape to measure from the bottom corner up to the top. Most laptop options are pretty slim, and bag options will accommodate them easily.

After measuring the height, you need to measure your laptop depth. To measure the depth, place the measuring tape vertically from one corner to the other on top of the laptop. As noted, all of these measurements should be in inches. If there is a curve to the shape of your laptop, make sure to include it while you measure the depth.

Laptop Bag, Case, or Sleeve: Which is Right for You?

Laptop on a case

Considering the way you travel and how many items you intend on carrying, will help you determine whether you should buy a bag, case, or sleeve. You may find that you have use for all three types of carrying options or that one is the obvious choice for your lifestyle.

Most people are pretty familiar with what a laptop bag looks like. They typically look like the soft version of a briefcase. Additionally, they usually have a long strap so you can carry it over your shoulder. The bag options tend to be a bit bigger and offer more organizational space when you need to take multiple items in them.

A laptop case is going to offer higher levels of protection. They are typically made with a hard outer shell. This can protect your computer from serious damage if an accident occurs. When you like to go to remote places to work, a case may be the best option.

Many people love the sleeve option because it’s not very bulky. A laptop sleeve offers limited protection, but it also cuts down on bulk. You will be able to carry things like papers along with your laptop inside of a sleeve, but there isn’t room for much more. Sleeves are best suited for those that don’t take their laptop on the go frequently and want to cut down on the space of a standard bag or case.

Picking the Perfect Laptop Bag, Case, or Sleeve

Laptop on a bag

Now that you’re done measuring your laptop and its screen, it’s time to find the perfect bag. Remember that when you’re looking at options, they will be measured in inches. This can save you a lot of hassle and ensure you pick a bag that will work for the size of your laptop.

When you buy a laptop bag, you’ll want to purchase one that is pretty close in measurements to your laptop size. This will ensure a snug fit, which will offer better protection of your laptop, screen, and accessories. With too much movement, you can damage your laptop while you’re traveling, and that’s another reason accurate measuring is a must.

Some features of a laptop bag that you should look for are:

+ Measurements in inches
+ A snug fit
+ Padded compartment so no additional padding needed for protection
+ Internal strap to secure your laptop in place

Cushioning in your carrying case is critical. The padding absorbs shock and providers a protective cushion for your laptop. Many bags offer padded bottoms, which provides even more protection for your laptop. If you were to drop your bag, this extra cushioning could help ensure no damage comes to your computer.

Other than cushions, you will also consider the additional items you will want to carry in the same bag. Many people carry a mouse and their charging cord with them. This is only an example of the many things you may want to have with you while you have your laptop with you. Considering the size of the extra items will help ensure you get a bag that can handle the task at hand. You may end up measuring these items (remember to measure in inches) so that you know how well your extras will fit.

If you’re carrying extra items, you should be careful. A laptop is not a cheap thing to replace, and unfortunately, damaging them is pretty straightforward. Many bags will offer padded pockets for your extras or an extra thick layer of cushioning to keep the laptop well protected. There are also a variety of options that have separate zipper compartments for the additional items you need to carry. These compartments help ensure your laptop does not become damaged while in transit.

Conclusion

No matter the reason you need to measure your laptop, know that it’s easy. You should likely jot the measurements down and stick them somewhere safe in case you need them at a later date. Once you find the perfect case, you may then decide to invest in a sleeve or other carrying option.

Having your measurements handy will simplify the task of knowing which size to buy. You can find quality items in a variety of locations, including Amazon.com and other online sites, which make finding your perfect carrying case a breeze.

This is Why Your Laptop Battery Dies So Fast & How to Fix it!

Angry man holding his laptop

It doesn’t matter if you use your laptop for work, school, gaming, or browsing the internet; no one likes it when their battery dies when they’re in the middle of doing something. Although each laptop is different, the majority of battery life issues are caused by the same few reasons.

We’re going to have a look at them here. And we’re also going to help you to avoid these laptop battery issues in the future by giving you some top tips for extending your battery life. Let’s get started.

Top Eight Reasons Why a Laptop’s Battery Dies Quickly and How to Fix Them

Your laptop’s battery is likely running out of power quickly because of one of these eight reasons:

1. Faulty or Old Battery

Laptop and battery

Unfortunately, the top reason why a battery is running out of power so quickly is simply that it needs to be replaced. If your laptop is more than three years old, then there’s a chance that it now needs to be replaced. This is the same with any battery – not just for a laptop – as they simply can only function for so long.

2. The Screen is Too Bright

Laptop with blank screen

When did you last check your screen brightness settings? If you’re scratching your head or you answered this question with a swift ‘never,’ then it’s time to check your brightness settings. If you’re running Windows, then you simply need to go to the ‘Display’ page in your System Settings. You’ll be able to adjust the level of brightness here.

You may want to reduce the brightness each time that you’re running your laptop on its battery, and then make it brighter when you’re plugged into the power mains. If you do this, then always make sure that you’ve returned the brightness to a lower setting when you unplug your laptop.

3. Keyboard Backlight

Laptop keyboard backlight

If you’ve got a backlight on your keyboard, then you want to turn it off when you’re running your laptop on its battery. A backlight is an unnecessary feature for most laptop users that can contribute to a battery draining fast. If you’re not sure how to turn it off, then don’t worry; it’s very easy for Windows users. You just need to go to the ‘Control Center,’ then click on ‘Mouse & Keyboard’, and you’ll be able to turn off the keyboard backlight on this page.

4. You Need to Turn on Power Saver Mode

Battery settings

Power can sap from your laptop’s battery if you’ve also got the wrong settings on for your laptop when it’s running on its battery. You don’t want your system to think it can download updates or run lots of background programs when it’s on the battery.

Fortunately, an easy fix for Windows users is to create a Power Saver mode for when your laptop is running on its battery. To do this, you can go to the ‘Power & Sleep’ area of your System Settings.

Once you’re there, you’ll see the words ‘Additional Power Settings’ on the right of the page. Click on it. And then, you’ll be taken to a new page where you can create a handy power-saving mode to stop your battery draining fast.

5. Too Many Background Apps Running

Background apps settings

Windows is full of background apps that will automatically run unless you turn them off. These background apps can cause a battery to start draining fast. If you use Windows on your laptop, then you can easily turn them off. You just need to visit Settings, then click on Privacy, and then on Background Apps.

You’ll see a list of all the apps that are running in the background while you use your laptop. You might be surprised by the number of them. Just toggle off the ones you don’t need to have running in the background. It can also help your laptop as a whole if you remove these apps from your laptop completely. This can be done by visiting Add or Remove Programs in System Settings.

6. Too Many Processes Running

Task manager settings

Not only do apps run in the background when you use your laptop, but processes are running too. You want to stop any of these processes that you don’t use. To do this, you need to open your Task Manager. Once you’ve opened it – which you can do simply by pressing Control, Alt, and Delete at the same time – then you will see a list of processes.

If you see something you’re not using or don’t recognize, then simply click on it, then click on End Task. Some processes are important, however, and if you don’t recognize the name, then it may be a good idea to search on the internet for the name of the process before you end it. If you do this simple task, then it will help to improve your laptop battery life.

7. WiFi and Bluetooth Aiding Battery Drain

Wifi settings

If you use your laptop on its battery without using the internet or Bluetooth, then it’s a good idea to turn both of these settings off while you’re using the laptop. You can disconnect your laptop from wireless internet by going to your WiFi settings in the System Settings. You can also do this for Bluetooth. Although having your WiFi setting on and your Bluetooth on won’t be the main culprit for why your laptop battery is draining fast, it will contribute to it.

8. Too Much Power Being Used

Playing game on the laptop

The last reason why your laptop battery is dying quickly is a simple one. It’s because you’re using it up. If you play high-power games with lots of graphics, then your laptop will be using a huge amount of to power the game.

There isn’t a way to make the laptop battery last longer if you use your laptop for gaming, producing, or another task that simply uses a lot of power. It’s essential to keep in mind, however, that constantly running your battery down to the point where it’s completely flat will shorten its life.

It can also cause your laptop to crash, as it suddenly needs to shut down when the battery is dead. The more a battery malfunctions, the more likely that it suddenly dies before it can go through the right Shut Down procedures. If you do use your laptop for gaming or a high-power task, then make sure that you plug your laptop in when you do these things, as it will preserve your laptop battery in the long term.

Summary

The reason why your laptop’s battery is draining so quickly might be different from another person’s. But there’s a good chance that the cause of your battery’s short life is down to the eight reasons that we’ve outlined. For a lot of people, the reason is just that your battery isn’t what it used to be.

It will continue to die quickly unless you replace it, and it could even drain more quickly as time goes on too. If you’re lucky, though, then your battery isn’t lasting very long because of apps or processes running in the background.

Calibrating your laptop so that it functions better when it’s being run on its battery alone is a good idea. Turning off unnecessary features when you’re not using them – such as Bluetooth, WiFi, or a keyboard backlight – will also help to make your battery last longer.

How to Optimize Windows 10 for Gaming

Boy playing CSGO

There are many reasons why PC gamers won’t exchange their trusty laptop or desktop for a console. Quite simply, PC gamers have more choice when it comes to the number of games available to them, and those games are far cheaper than you need to pay for console games.

A computer is easier to immerse yourself into, partly because of how close you sit to the screen, and the quality of graphics is better than a console, too.

The only thing that can sometimes hold PC gamers back is their operating software. While Windows 10 is an excellent piece of software, it can slow down gaming if you don’t make a few tweaks. We’re now going to look at how to optimize Windows 10 for gaming so that you can have the most immersive gaming experience.

Top Tips For How to Optimize Windows 10 For Gaming

Tip #1 – Change Windows 10 Automatic Updates

Windows update

The easiest and simplest way to optimize Windows 10 is by altering how Windows searches for updates and downloads them. This is useful for several reasons. Firstly, you’ll find that your gaming performance won’t be interrupted by lagging because your internet’s bandwidth will be used up by the download of Windows updates.

They can be large files. You don’t want them taking up bandwidth. You also don’t want to ruin your gaming experience if your computer decides to restart so it can finish the Windows update.

To do this, you just need to press the Windows key, then select Settings from the list of programs. Once Settings has opened, you should see a choice for Windows Update on the list. Simply click on Windows Update, then scroll down to Advanced Options. Click on it.

Then turn off the automatic restart setting. You also can pause Windows Update for up to 35 days, so you won’t have any issues for a while, and can play game after game without ever having your bandwidth strained by a Windows 10 update.

Tip #2 – Change Your DNS Settings

DNS settings

The second way you can optimize Windows 10 for gaming is by altering your DNS settings. This is ideal for any online gamer, as it will reduce issues related to network traffic.

You’ll want to press the Windows key, then select Settings from the list of programs.

Then, you need to look through the list on Settings and click on Network & Internet. This will open up a new page, and you want to select Change Adapter Settings from the list.

You should see your WiFi network’s name on the new list. Right-click on it. And then you want to click on Properties.

You’ll see a box with a list that has Client for Microsoft Networks at the top. Click on Internet Protocol Version 4, which is fourth on the list. You should now be able to see what the DNS numbers are for your WiFi network. It’s best to write down these numbers, as you may want to change the settings back in the future. Once you’ve done this, then you’ll want to change the numbers to 1.1.1.1 and 1.0.0.1. After that, it’s best to restart your computer.

Tip #3 – Use Windows 10 Game Mode

Game mode settings

Game Mode is built into Windows 10 for gaming enthusiasts, so if you use Windows for games, then you want to use Game Mode too. It’s simple to switch on Game Mode. Once again, you want to tap the Windows key, then select Settings from the list.

You’ll now see that one of the options is entitled Gaming. Click on it. Then look on the list on the left for Game Mode. Click on Game Mode. And then you should see a toggle for Game Mode. If it’s toggled off, then turn it on, and if Game Mode is already on, then you don’t need to do anything.

Tip #4 – Turn Off Windows 10 Notifications

Notifications settings

The notifications that Windows 10 give you are very important, as they tell you exactly what’s going on with your computer. But if you want to optimize Windows 10 for gaming performance, then it’s best to alter the settings for these notifications, as you could find your gaming performance ruined by an unwelcome notification.

To alter Windows 10 notifications settings, you need to tap on the Windows key, and then go to Settings. In the top left, you’ll see System, and this is what you want to click on. You now have two options. You can click on Notifications and then select what Windows 10 notifications you want to receive and when. You can also click on Focus Assist. There’s an option on this page to turn off all Windows 10 notifications while you’re playing a game.

Tip #5 – Change Mouse Acceleration Settings

Mouse acceleration settings

Another way to optimize Windows 10 for gaming is to disable mouse acceleration settings. To do this, you’ll want to go to Settings, then click on Devices, and then select Mouse from the list on the left-hand side. You then want to click on Additional Mouse Options.

Once you’ve done this, you should see an option for Pointer Options, which is what you want to select, and then, so that you can improve gaming performance, you want to make sure that there’s a tick in the box beside Enhance Pointer Precision. You’ll find that after you disable mouse acceleration settings, it will also give you a more intuitive cursor and mouse relationship, which can only enhance gaming performance.

Tip #6 – Update Your Drivers

Driver update

As every keen gamer knows, gaming performance is at its best when graphics run smoothly without any lag, and to adjust for best performance, you’ll want to make sure that your drivers are all up to date. This way, you can enjoy a Windows gaming experience at its best.

There are several ways that you can update your drivers on Windows 10. Perhaps the easiest way, however, is to visit your computer manufacturer’s website. To do this, you should simply type into a search engine the name of your manufacturer and the words ‘drivers update’. This will then take you directly to the right page.

Tip #7 – Improve Your Computer’s Power Performance

Power settings

To optimize Windows 10 for gaming, you’ll want to change your power plan for high performance. At the moment, it’s likely that your current power plan won’t offer the high performance that you need for Windows 10 gaming. To adjust for the best performance, you want to follow these steps.

First, you want to tap the Windows key, and then you want to select Settings from the list of programs.

You next want to click on System, which is in the top-left corner.

On the left, you will see a list, and you want to select Power & Sleep from this list.

You then want to click on Additional Power Settings.

This will open up a new box for Power Options.

You will see your current power plan, and it will have a description beside it, such as Balanced.

You want to click on Change Plan Settings.

Now you’ll be able to change your power plan, so it offers high performance for Windows 10 gaming.

Tip #8 – Change Your Gaming Client’s Auto-Update Settings

Gaming client auto update

As we’ve already discovered with Windows 10 Update, if you have automatic updates running in the background while you’re gaming, then it will hamper the performance of your computer and your internet.

If you use Steam or Blizzard or another gaming client, then you may have it set up so that you automatically download updates to your games when they’re ready, but you don’t want this to happen when gaming. Windows 10 has to be optimized for better performance, but it can only do so much. You also need to change the settings on other software if you want a better Windows 10 gaming performance.

The process you need to go through to turn off automatic updates so that you can optimize Windows 10 for gaming will depend on your gaming client.

With Steam, you just need to open the app, go to the settings area, and then to downloads, and you then want to make sure that Allow Downloads During Gameplay isn’t selected.

You may also want to turn off updates for the odd game or two that you don’t tend to play anymore. To do this, you just need to visit the Steam library, locate the game you’re not playing much anymore, and then alter the update settings by right-clicking on the name of the game, and then opening Properties. You’ll see an area here that’s focused on Automatic Updates. You want to turn them off for this game and for any game in your library that you don’t use anymore.

Tip #9 – Download the Latest Version of DirectX

DirectX Microsoft

As every Windows gamer will tell you, DirectX is an essential component of Windows 10 for making the performance of a game run smoothly. That’s the reason why you need to make sure that the latest version of DirectX is installed, as it’s necessary if you truly want to optimize Windows 10 for high-level game performance.

The most recent DirectX version is called DirectX 12, although Microsoft has announced that the next version DirectX 12 Ultimate will be available for Windows 10 users soon. To find out what version you have so that you can ensure that you’re up to date, then you need to open Windows Power Shell.

Once you’ve done this, you want to type dxdiag into the Windows Poer Shell, and then press Enter. This will load up a box with all the information about DirectX. You’ll then be able to see what version of it is currently installed on your Windows 10 computer.

Tip #10 – Change Visual Effects Settings

Visual Effect Settings

The final way that you can optimize Windows 10 for gaming performance is by altering your current Visual Effects settings. It’s very easy to change your Visual Effects settings on Windows 10, and it can have a big impact on performance too.

The reason why you should do this is that your computer will be doing too much at one time. You want your computer to be dedicated to the game you’re playing. Windows 10, however, will be focused on what’s running in the background while you’re playing the game.

To get to the right area of Windows 10, you should press the Windows key and the letter I at the same time. You will now see a list of options, as well as a search box – you’ll want to type ‘Performance’ into this box. This will bring up another four or five options. The one that you want to click on is ‘Adjust the appearance and performance of Windows.’

This will open up a new box. You’ll see that Visual Effects are listed here. You’ll also see that there are four options for changing them. The first in the list is ‘Let Windows choose what’s best for my computer.’ To optimize Windows for gaming, you want to choose ‘Adjust for best performance’ instead.

Next to the Visual Effects tab at the top, you’ll see another one for Advanced. You want to click on that. Again there will be two options. These two options are related to how you want Windows 10 to adjust for performance. You want to select ‘Programs,’ not ‘Background Services.’

Summary

There are many small tweaks and fixes that a gaming enthusiast can do to optimize Windows 10 for better gaming performance.

For the most part, the things that get in the way of gaming are easily fixed, and to complete all the tips on this list, you’ll barely need fifteen minutes. Spending this short amount of time on turning off automatic updates for Windows 10 and your gaming client or altering the mouse, driver, and power settings can have a huge impact on the speed and fluidity with which you can play a Windows 10 game.

It’s always important for your computer performance that all your hardware, software, and drivers be up to date, and this’s especially true for game performance too.

Some things that can optimize Windows 10 for gaming are quite simple, such as turning off your notifications. How many times have you found a game interrupted because Windows wants to notify you of something that could certainly wait until a later time? Turn them off, and you’ll no longer be interrupted. And while you’re at it, make sure that Game Mode is switched on too.

And follow all the tips on this page, and you’ll have a quality experience gaming with Windows 10 in the future.

How To Use Laptop As a Monitor For Your PS4

Joystick and laptop

Most of the time, when you want to play PS4, you simply hook it up to your widescreen television, turn on your PS4, and then you’re ready for a long gaming session. But then, there are times when this isn’t possible. For example, you might take your PS4 with you on holiday or a road trip.

That means that all you’ve got is your laptop and your PS4. Fortunately, this is all you need to play your PS4, as you can easily use your laptop screen instead of a television. But, do you know how to connect a PS4 to a laptop? If not, then you’ve come to the right place, because we’ll go through the two main methods of how to connect your PS4 to your laptop. Let’s get started.

Method One: How to Use Laptop as Monitor for PS4 with a Video Capture Card

HDMI Video Capture Card

A video capture card is an excellent way of using your laptop screen for PS4 gaming. To do this, you’re going to need to buy a video capture card. They can be bought online or in any computer store. While you get your capture card, you’ll also want to buy an HDMI cable, as you’ll need this, too.

Don’t make the mistake of buying a USB cable. A USB cable is not the same as an HDMI cable. Besides the card and cable, you’ll need to have your laptop, your PS4, and a stable internet connection, either through WiFi or ethernet.

The first thing to do is to switch on your PS4; then, once your PS4 is on, you need to go to the network settings on the PS4, then go to Internet Connection settings, and connect it to your WiFi. If you’ve already established an internet connection between your PS4 and WiFi, then you don’t need to do this step. You can also establish an internet connection by plugging an ethernet cable into your PS4 from your router.

The video capture card will have an in-built USB cable, which you can then use to connect to the USB port on your laptop. Once you’ve connected the video capture card to your laptop’s USB port, then you need to install all the necessary software that comes with the capture card onto your laptop.

Next, you need to get the HDMI cable that you’re going to use for turning your laptop screen into a PS4 monitor. Plug one end of the HDMI cable into the HDMI output port on your PS4 and the other end into the capture card’s HDMI input port, not its output port.

On your laptop, you now want to open the software that’s related to the video capture card, which you should have already installed. Once it’s loaded, simply turn on your PS4. Now you should be able to play your PS4 while using your laptop as a monitor.

Method Two: Using Sony Remote Play with a Windows Laptop

PS4 Remote Play

Remote Play is an application that will allow you to play your PS4 on your laptop. The Remote Play connection is easy to establish from PC to PS4; you just have to follow these instructions.

Before you can get started with Remote Play, there are a few things that you’ll need. Firstly, you’ll want to have your PS4 and laptop ready. Next, you need a USB cable or a USB wireless adapter. You will need to ensure that you’ve got a DualShock 4 controller too. Besides that, you need a good-quality internet connection, as well as a Playstation account.

Now you’re set to use Remote Play so your laptop screen can be your monitor. You should open your laptop and then download the Remote Play application. The Remote Play application will then give you instructions that are simple to follow.

Next, you need to go to the Settings area of your PS4, and then you should go to the Remote Play settings. You have to enable the Remote Play function. You then should go to your account settings page. There will be an option to activate your PS4 as your primary system, which you’ll have to do.

Then, so that Remote Play can function even while your PS4 is in its Rest Mode, you have to go to the Power Saving Features page on your PS4 settings. Ensure that the option to stay connected to the internet is on even in rest mode. Also check the box for “Enable Turning on PS4 from Network.”

Now you’re ready to establish a Remote Play connection between your laptop and PS4.

Your PS4 has to be turned on. Although, if you have followed the previous steps, then it is sufficient for the PS4 to be in Rest Mode. Once this is done, then you want to get your DualShock 4 controller. You have two choices. You can plug the controller into your computer or laptop, or you can use a DualShock 4 wireless adapter so that you can use the controller wirelessly when using your laptop screen to play PS4.

Once your PS4 controller is hooked up or paired with your laptop, then you just need to open the Remote Play app on your laptop. A START option will come up. You’ll want to click on this. Next, you’ll be taken to a page where you can sign in to the Remote Play app, and you’ll do this with your PlayStation account details.

That’s it. Now you can use your laptop screen as a monitor when you play PS4 thanks to Remote Play.

Method Three: How to Use Laptop as Monitor for PS4 with Remote Play on an Apple Laptop

Joystick on laptop

If you’re looking to use your Apple laptop or computer so that you can play PS4 on monitor, then you want to download the Remote Play app for Mac. Then, on your PS4, enable Remote Play, which you’ll find on the Remote Play Connection Settings area of your PS4 settings.

Once you’ve done that, you want the PS4 you’re using to be the primary PS4, which can also be done on the Account Management page of your PS4 settings. You should also make sure that the power settings are right, as you want the PS4 to continue to function when in rest mode.

So, go to the appropriate area on your PS4 settings. Ensure that the boxes beside “Stay Connected to the Internet” and “Enable Turning on PS4 From Network” are both checked.

Now you want to go to the Apple laptop that you’re planning on using for your PS4. Connect your PS4 controller to the laptop; this can be done with a USB cable or simply through Bluetooth. Once you’ve connected the controller, you should turn the PS4 on.

Next, you want to open the Remote Play app on your laptop. Follow the instructions that are given to you, and log into it with your PlayStation account details. Then you’re ready to go. Now your Apple laptop screen will be a monitor for PS4 gaming.

What If Remote Play Isn’t Working?

Remote Play App

There’s one reason above all else why Remote Play doesn’t work, and it’s simply that your internet connection isn’t strong enough. Remote Play requires a decent amount of bandwidth for it to work properly, so if you don’t have enough bandwidth, then it just won’t be available to you.

PlayStation suggests that the minimum that’s required for Remote Play is 5 Mbps. It’s recommended that you turn off any device that could be using up bandwidth at the same time as you want to play your PS4 through your laptop.

So, if you’ve got a smartphone, then disconnect it from your internet. It can also boost your connection speeds if you use an ethernet cable to connect to the internet rather than WiFi. If this isn’t possible, then you should do all you can to boost your WiFi speed. One good idea is to try to get as close to the router as possible.

It can also help if you reduce the video quality of the PlayStation when using Remote Play, as this will then require less bandwidth as when you have it at its highest video quality. To reduce the quality of the video, then you simply need to open the Remote Play app.

You should go to you need to open the setting, and you specifically want to go for the Video Quality for Remote Play option, which you should find in Preferences. There are two areas of video quality that you want to reduce.

The first is resolution, and it’s best to either pick a standard or low resolution if you have slow internet. You should also alter the frame rate. It should be fine if you pick the Standard option for frame rate.

It’s important to remember that not all PS4 games are compatible with Remote Play, so if you are continuing to struggle to use Remote Play, then this could be because the game you’re attempting to play doesn’t work with Remote Play.

Summary

That’s it. Now you’re able to use your laptop’s screen as a monitor for playing PS4. It’s a simple process that can be done via Sony’s Remote Play app or through a video capture card.

Remember, if you’re planning on using Remote Play, you’ll want to ensure that you’ve got a strong, stable internet connection. You can find that it works better when you use your internet with an ethernet cable rather than through WiFi. Then again, if you’ve got strong WiFi, then it won’t matter.